Import Outlook Contacts to Office 365 Like a Pro – Unlock Convenience!
If you are looking for an easy way to import Outlook Contacts to Office 365? Then, go through this guide, you will find the different ways to perform the same without any data loss or error. Without any further ado let’s get into it.
In most organizations, contacts are important data, because they contain information about customers and other business-related people. In such cases, transferring contacts from Outlook to Office 365 becomes necessary. This article will provide quick and easy methods for importing contacts to Office 365 accounts.
Understanding the Benefits of Office 365 for Outlook Contacts!
Listed are the key advantages of migrating Outlook contacts to Office 365 –
- Using Office 365 one can access contacts from any location or device via the internet.
- With robust security features like version history and deleted item recovery, O365 is the leading platform for data security.
- Contacts are automatically backed up in Office 365, reducing data loss risks.
- Integrates with other Office 365 applications for improved productivity.
- managing and accessing contacts becomes easier with O365 APIs.
How to Import Outlook Contacts to Office 365?
This can be done either by manual method or by using the software. Here in this post, you will find both solutions. Read the complete write-up and transfer contacts from Outlook to Office 365 effortlessly.
Method #1: Moving Contacts from Outlook to Office 365 Via Outlook
Importing Outlook contacts to Office 365 is a two-step process. The first step is to import Outlook contacts into .csv file format. The second step is to import the resultant .csv file into a Microsoft Office 365 user account.
Step 1: Transfer Outlook Contacts in CSV Format
Follow the below steps to export Outlook contacts into a .csv file format. Remember to export Office 365 contacts to vCard format not possible with this approach.
- Open the MS Outlook application and go to the File tab (at the top left corner)
- Click on Open & then select the “Import/Export” tab.
- Choose the “Export to a file” option from the list
- Now, choose the Comma Separated Values (Windows) option & click Next
- Browse to the location to store the CSV file and click Finish.
Step 2: Import Outlook Contacts to Office 365
After getting the .csv file of Outlook contacts. You need to just import it into your Office 365 user account. Perform the below-mentioned methods:
- Log in to your Outlook Web by providing credentials
- Hit on Peoples from the header of the opened window moving contacts from Outlook to Office 365
- After that click on the gear icon and then Import Contacts Export Outlook Contacts to Office 365.
- Now Import Contacts window will appear. Do a mouse click on Choose File. import contacts from Outlook 2013 to Office 365
- Navigate to the location where you saved the .csv file created in Step 1 and select. After that hit on the OK button.
- After completion, your Outlook contacts will appear in the Outlook for Web or Office 365 account.
Method #2. Import CSV Files Directly
As we saw in Method 1 (Step 1), after exporting the contacts from Outlook, we find a CSV file, and we can directly import Outlook contacts to Office 365 without Outlook. But how? Let’s understand –
Step 1. Open the Office 365 Admin portal.
Step 2. Then, on the right-hand side, click Users > Contacts.
Step 3. Then, hit Add Multiple Contacts option > Add Contacts.
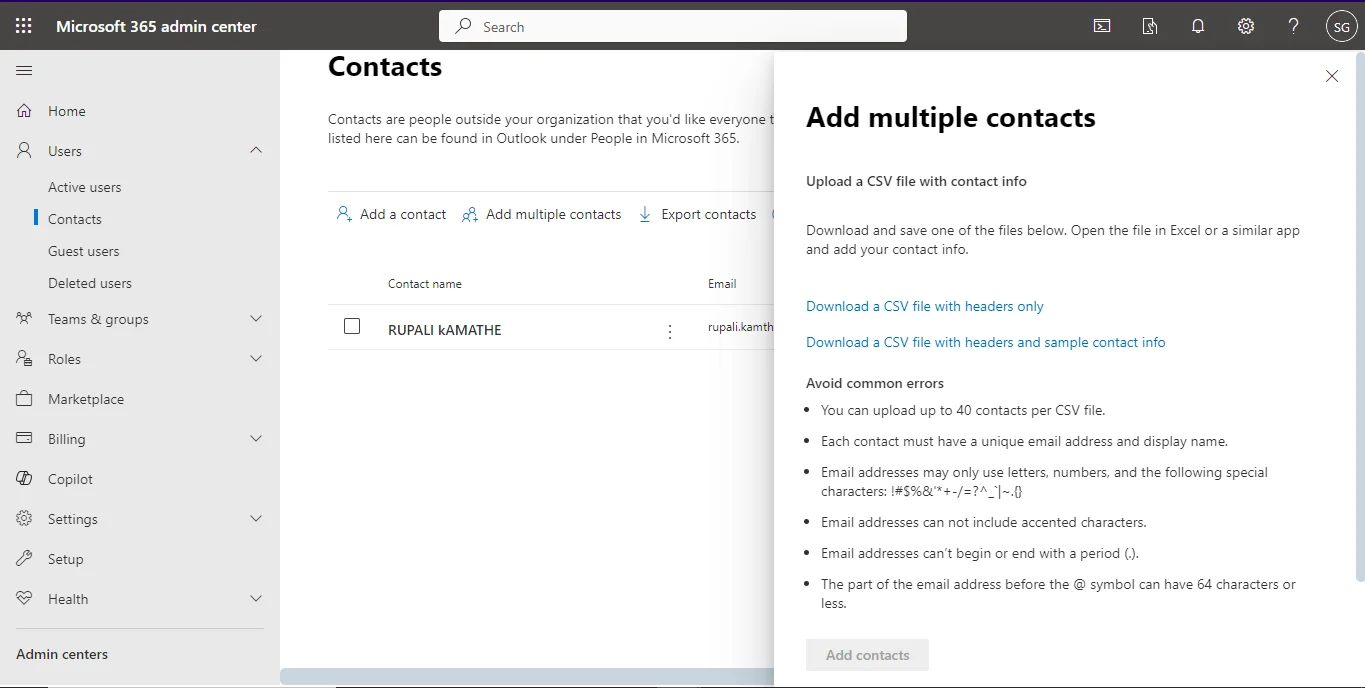
Step 4. Finally, click on Upload CSV file, and import them to Office 365.
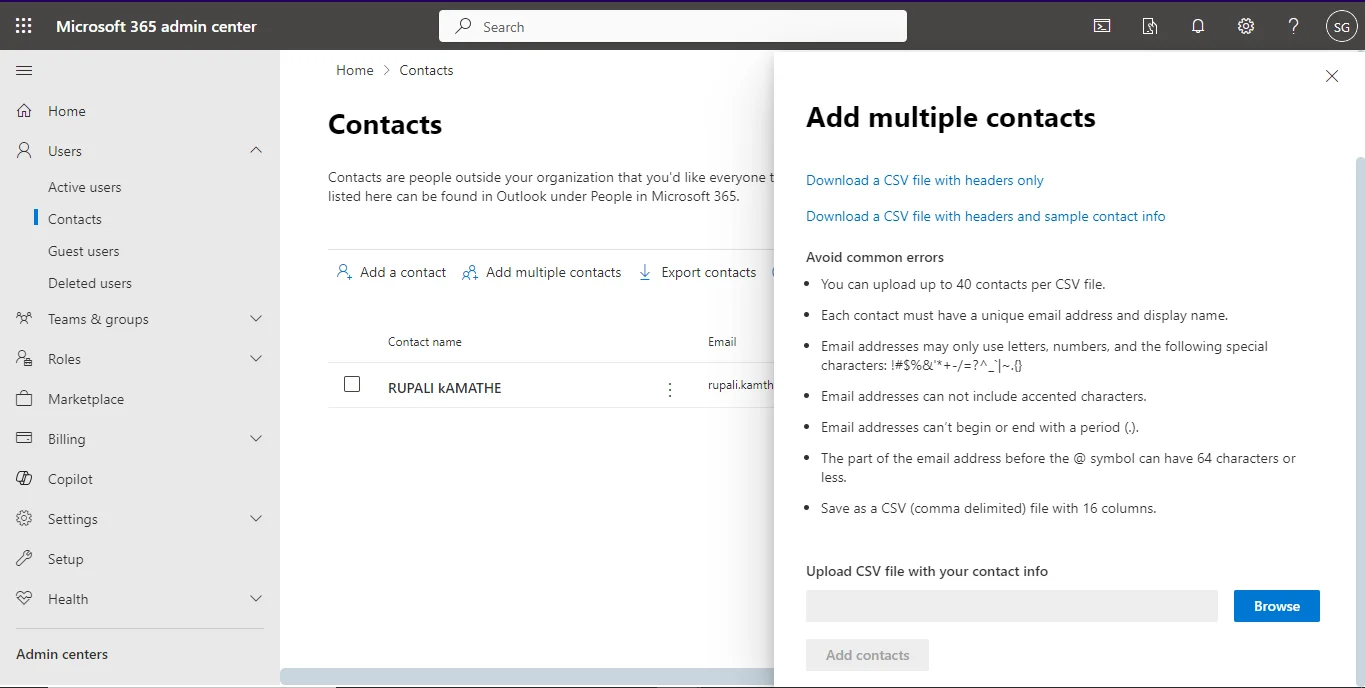
Note – Ensure your CSV file matches the demands to import i.e.
Method #3. Transfer Outlook Contacts to Outlook for Web (O365) Automatically
This method explains how to import contacts from Outlook to Office 365 using professional software. If you wish to import organizational data, then the manual approach is quite hectic to perform. To import Outlook contacts to Office 365 effectively try this Office 365 Import Tool. It will empower you to import Outlook calendar to Office 365, and emails, without changing data integrity.
Also, the utility makes it easy to export contacts from Outlook 2007, 2010, and 2013 to Office 365.
Software Steps to Transfer Outlook Contacts to Outlook for Web
Step 1. Choose the source platform as File System and the destination platform as Office 365 to import contacts file data.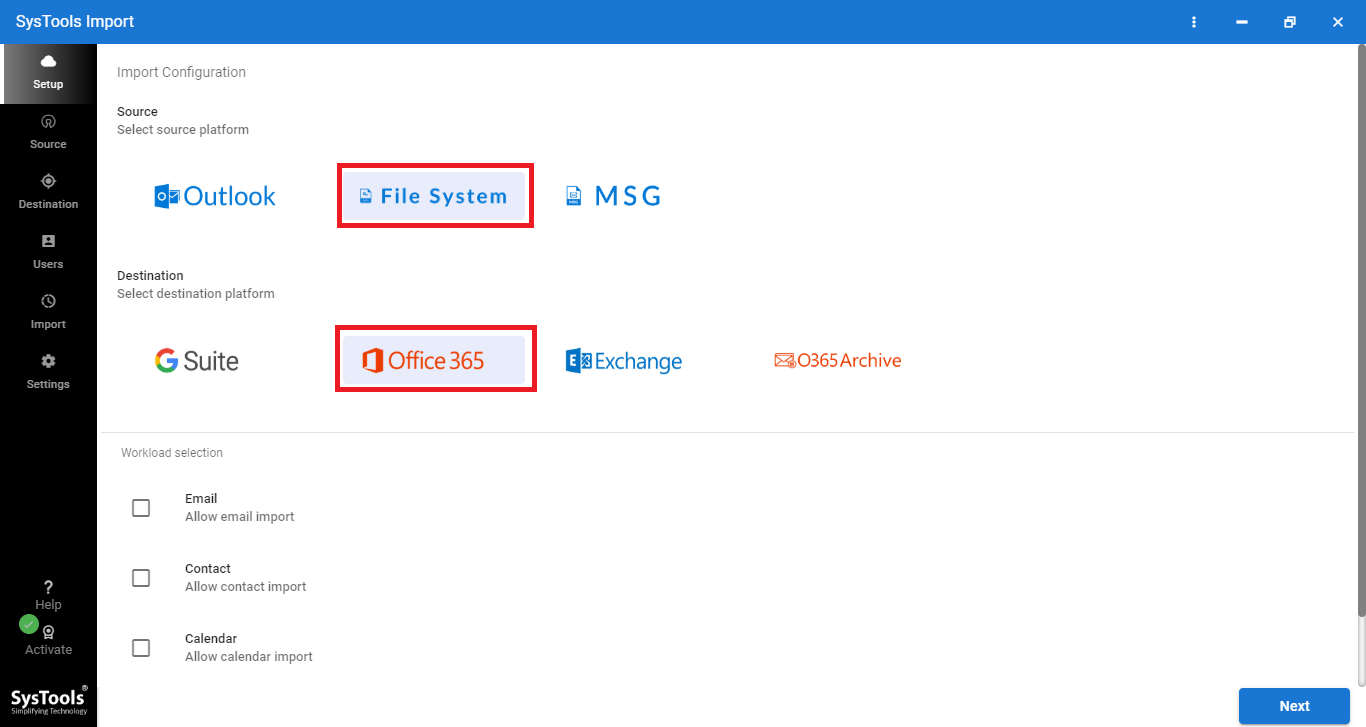
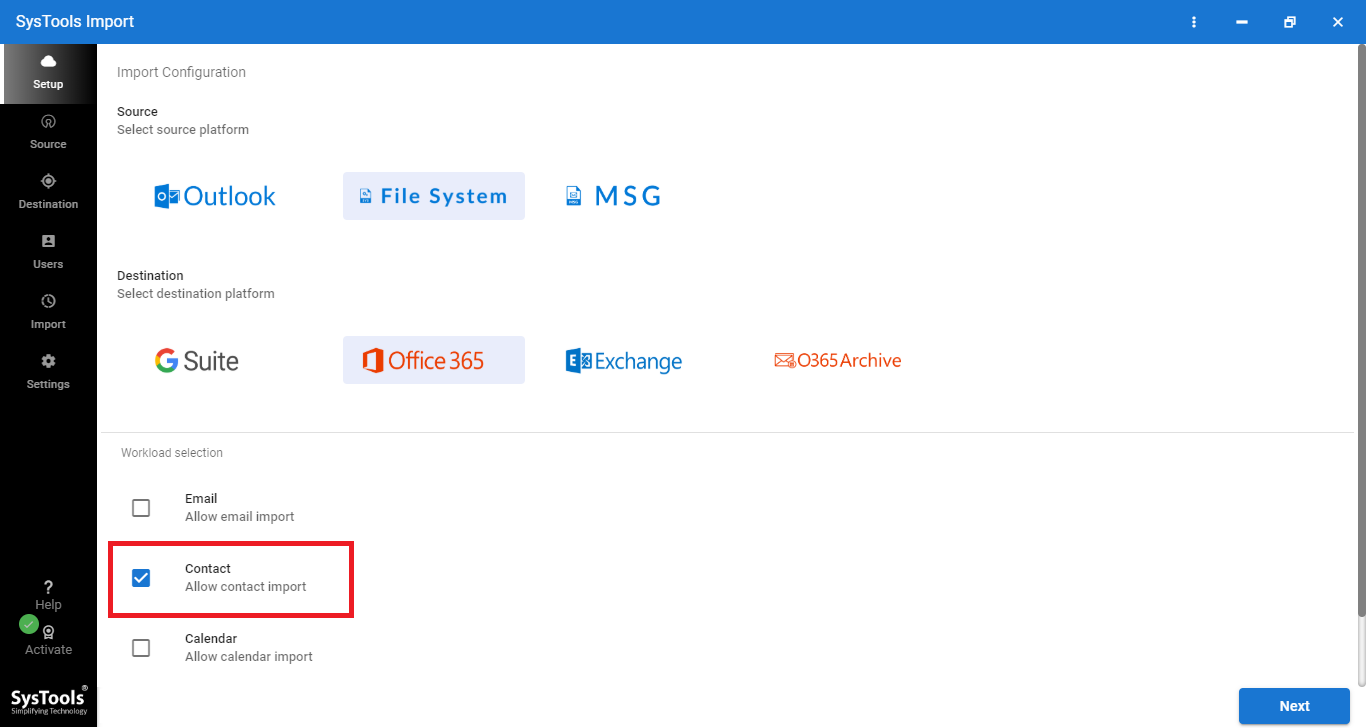
Step 2. Choose the Contacts option to configure the import Workload. Click on next.
Step 3. Now in the source tab –
- Create a root folder.
- Inside the root drive, make a VCF folder.
- Create individual folders for each target O365 email ID.
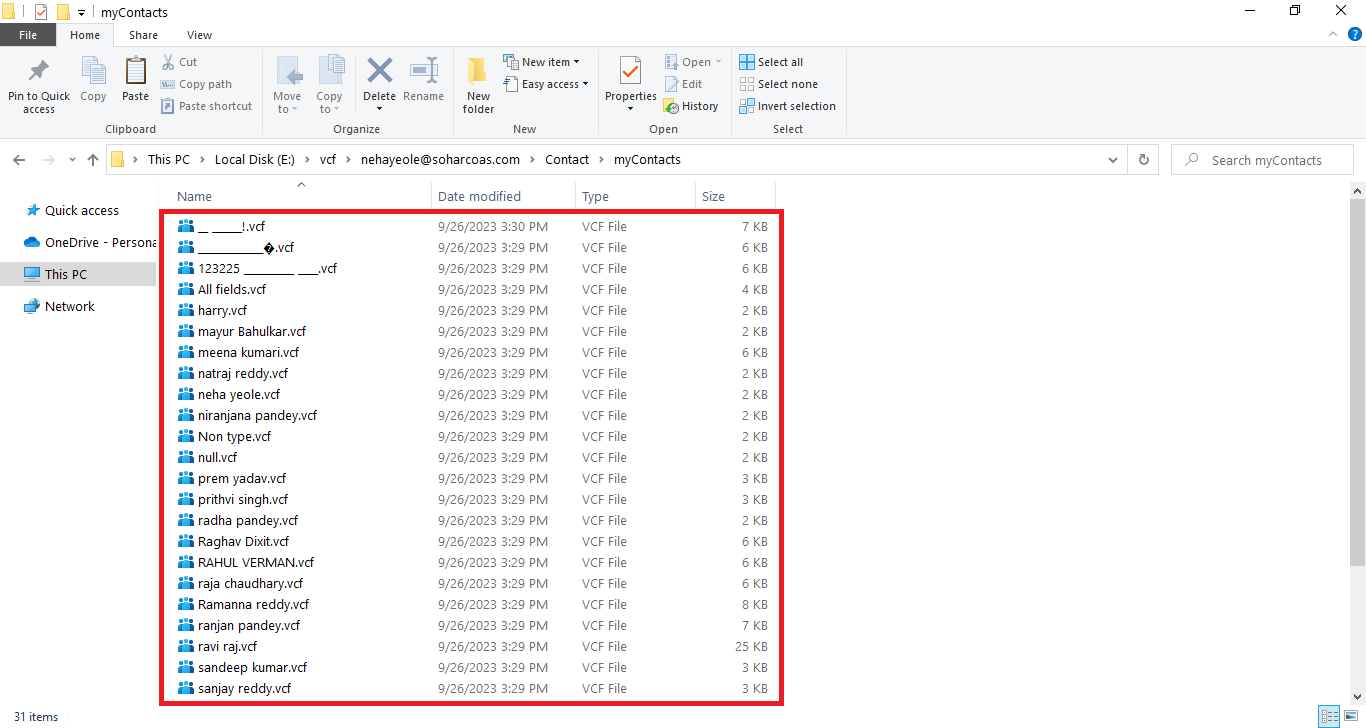
- For Contacts, make a separate Contact folder within each user’s folder.
- Subfolders within Contact folders can be created as needed.
- Store the respective *.vcf files in these subfolders.
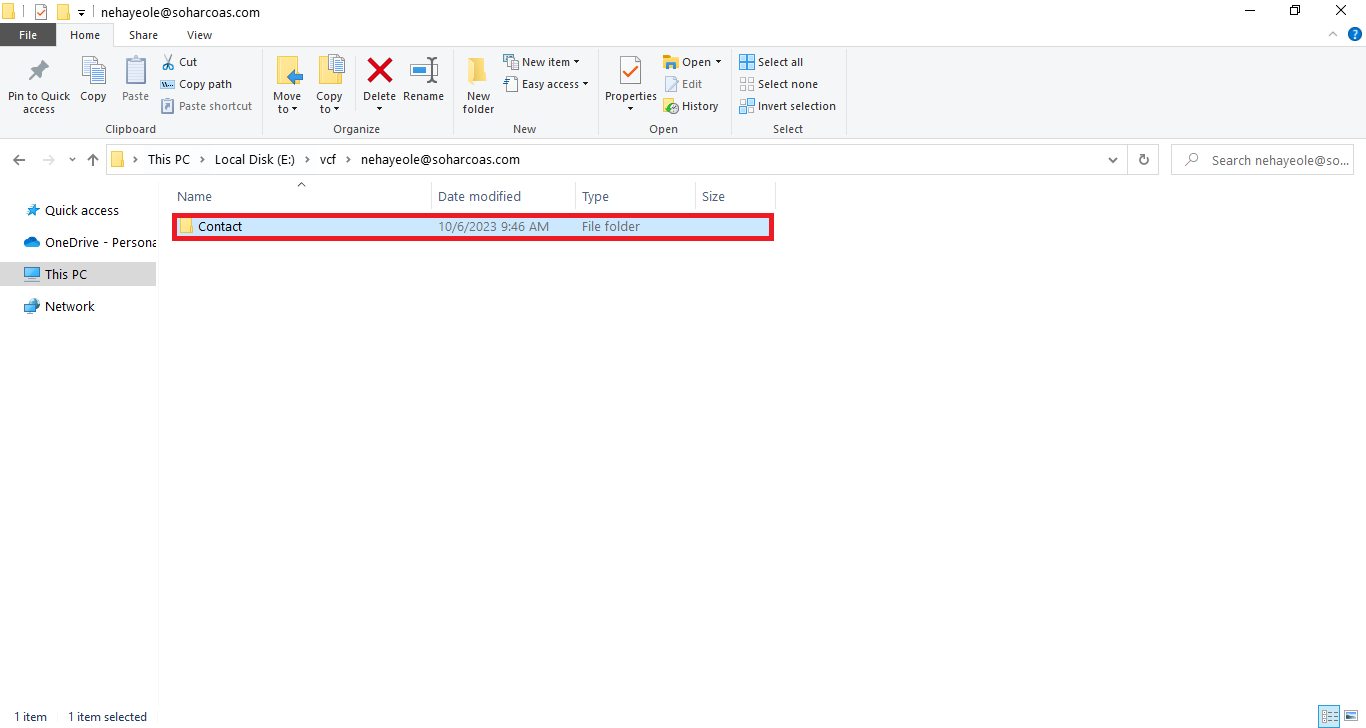
Folder Structure Example:
- E:/VCF/Email/Contact/SubFolder/ (for user1)
- E:/VCF/Email/Contact/SubFolder/ (for user2)
- E:/VCF/Email/Contact/SubFolder/ (for user3)
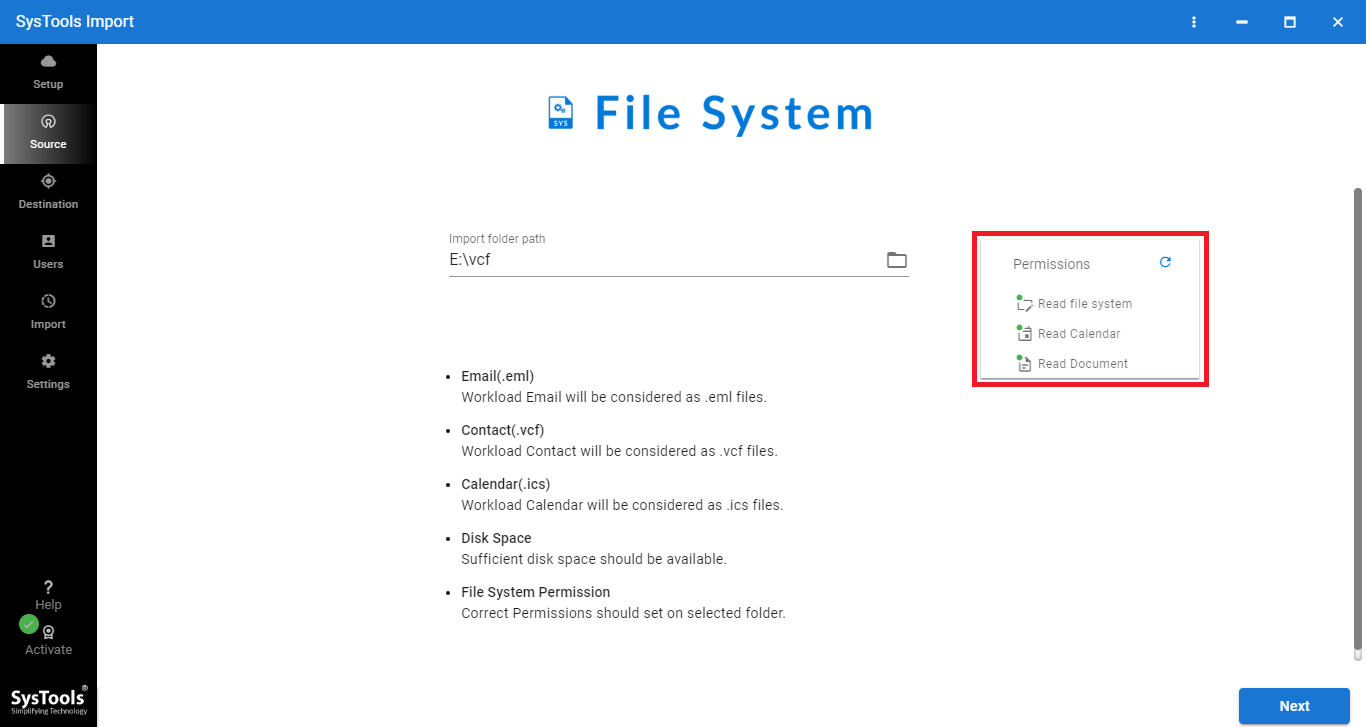
Step 4. Then select the “E:/VCF/” folder as the “Import Folder Path” in the tool. Click Validate to ensure correct permissions.
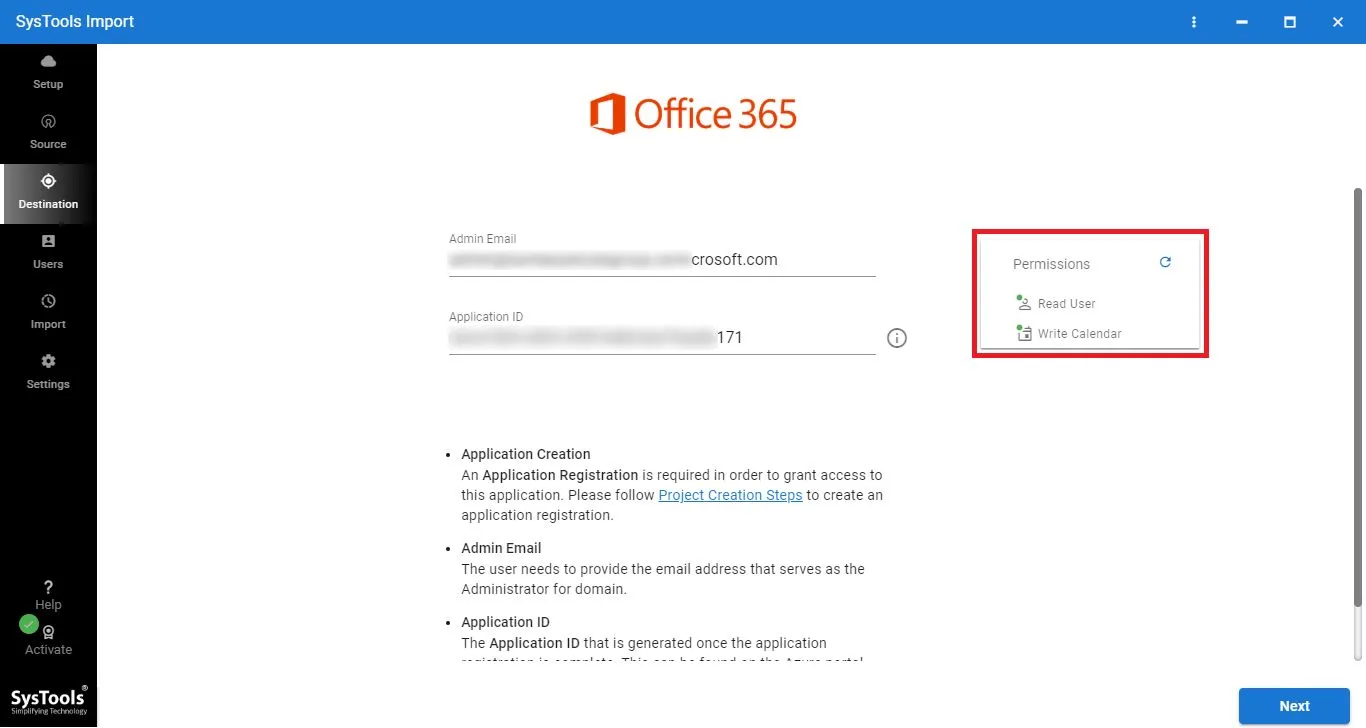
Step 5. Provide Admin Email and Application ID details accurately. Click on Validate to grant the necessary permissions.
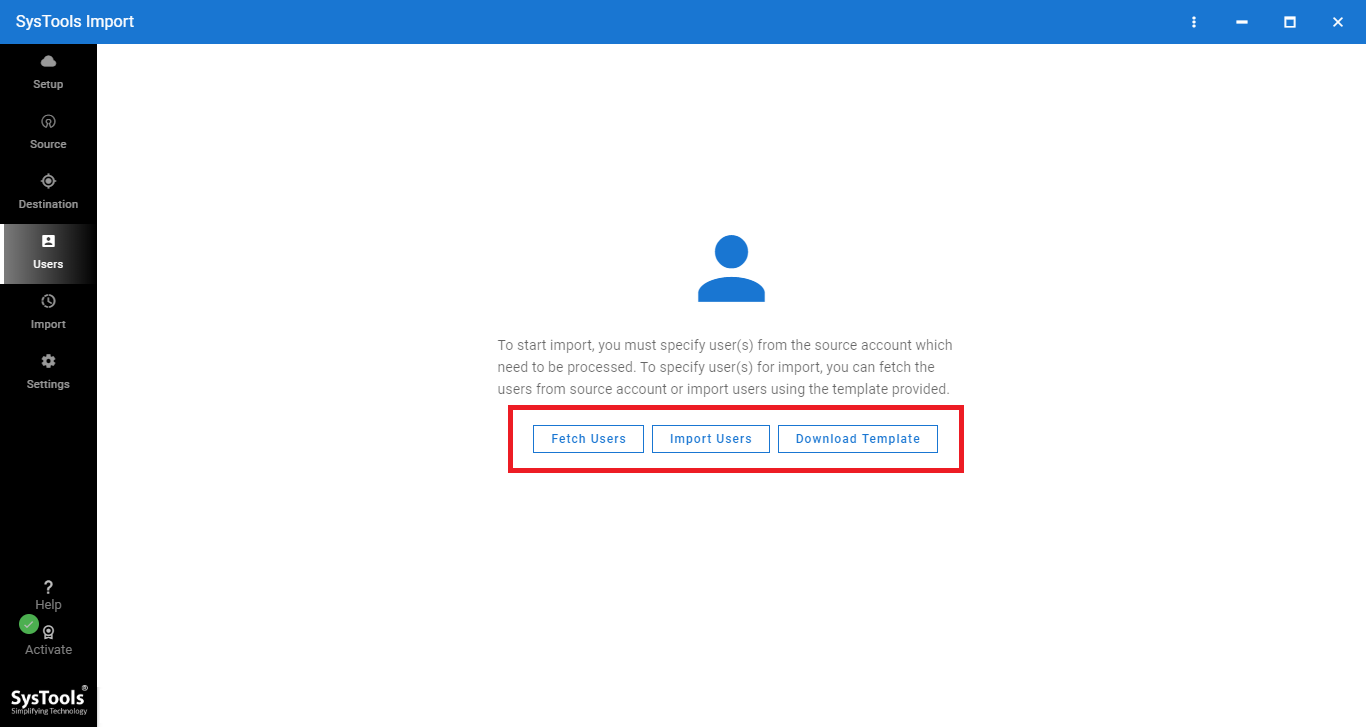
Step 6. You can add users from the source account in multiple ways:
- Fetch Users: Automatically fetch users from the Source domain.
- Import Users: Import users through CSV.
- Download Template: Obtain a sample CSV file for manual user addition.
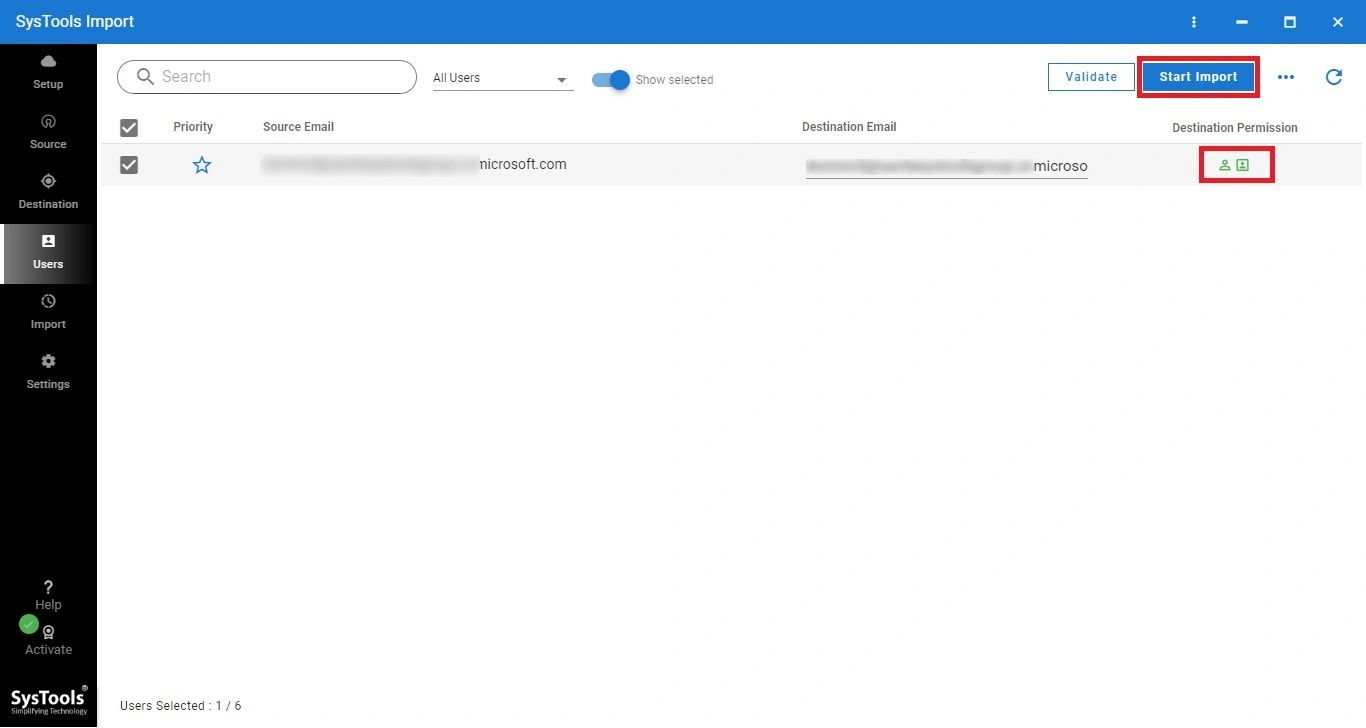
Step 7. After adding the required user accounts, then click on the validate button. Once user validation is successful, click “OK.” Initiate the import process by clicking the “Start Import” button.
Method #4. Use PowerShell Codes to Import Outlook Contacts to Office 365!
Install the Exchange Online Management Module:
Install-Module -Name ExchangeOnlineManagement
Connect to Office 365:
Connect-ExchangeOnline -UserPrincipalName software-email@solution.com
Prepare your CSV file like this:
FirstName,LastName,EmailAddress
Cathy,White,cathy.white@tenant.com
Importing Contacts:
Now, using the New-Contact cmdlet will add contacts to the user’s contacts:
$contacts = Import-Csv "C:\path\to\your\contacts.csv"foreach ($contact in $contacts) {New-Contact -Name "$($contact.FirstName) $($contact.LastName)" -EmailAddress $contact.EmailAddress }
Verify Contacts:
You can check your contacts using:
Get-Contact | Where-Object { $_.Name -like "*Software*" }
Disconnect:
Disconnect-ExchangeOnline -Confirm:$false
Why Consider Automated Solution Over Manual?
Here are some common drawbacks that are faced by users when they import Outlook contacts to Office 365 manually –
- Compatibility issues between Outlook versions and Office 365.
- Potential manual adjustments are required post-transfer.
- Risks with transferring large contact volumes.
- Challenges with transferring custom fields and categories.
- Handling non-standard data or special characters.
- Access and permission constraints impacting migration.
- Limitations with unsupported or specialized contact types.
- Localization discrepancies affecting data transfer.
Furthermore, they will work only with single-user contact data. Nontechnical users can not perform these methods efficiently. Also, they will not be able to move bulk contact from Outlook to Office 365. Any mistake or improper operation will lead to permanent data loss!
Final Verdict!
After reading the complete write-up. I’m sure you will choose a reliable solution to your query on how to import Outlook Contacts to Office 365. You can opt either for the manual method or the automatic way.
Still, it is recommended by the experts to opt for the specified smart solution to migrate Outlook contacts to Office 365 simultaneously. For testing, you can try the demo version of the tool for free. Plus, if any doubt feel free to contact us!
People Also Ask!
Q1. How to directly import Outlook contacts to Office 365 using a PST file?
To import Outlook contacts from a PST file into Office 365:
- Open the PST file in Outlook
- Use the Import/Export Wizard to export the contacts to Office 365.
Q2, What file formats are supported when importing contacts to Office 365?
Office 365 supports importing contacts in the VCF format. However, if your contacts are available in the PST, then also you can import that file to Office 365.
Q3. Can I import contacts into Office 365 without using Outlook?
Yes, you can import contacts directly from a CSV file into Office 365 by following these quick steps:
- Open the Office 365 Admin Center.
- Go to the People section.
- Click on Manage contacts.
- Select Browse to upload the CSV file.


