How to Remove Write Protection from USB Windows?


Write protection on a USB or pen drive is a security option that stops data from being written to the drive. It can be a helpful app to avoid mistakenly or accidental data loss or modification. Still, there may be times when you want to remove write protection from USB windows 11 or 10. like when you want to format drive or move files to or from it.
If you are facing a circumstance where a USB flash drive is written protected by Windows, then don’t worry. Here in this detailed guide, you will be explained the multiple ways using which you can remove the write protection from your USB device.
What is Write Protection?
Write protection is the feature that disables users from making any modifications to the data. It enables the read-only setting for the particular removal device via the operating system. It used to keep the content of the drive safe from viruses and malware if you needed to view the content on any public system.
Understanding Write Protection on USB Drives
Write protection on a USB drive can be applied by application or hardware means. When write protection is enabled, changing, deleting, or adding files to the USB drive is blocked. There are many cause why a USB or pen drive may be write-protected:
- Moving the Physical Write Protection: Most USB flash drives do not have a physical switch to enable or disable write protection. If your USB drive has this move, it may be set to the lock position which restricts writing to the device.
- Corrupted/Damaged File System: If the file system on your Pen drive is corrupted, Windows may automatic place the drive in a read-only state to prevent further damage.
- Malware or Virus: In some cases, malware or viruses can lock the USB drive, preventing users from accessing or modifying files.
- Hardware or outdated application issues: An old or failing USB or pen drive may have difficulty functioning normally and exhibit write-protected behavior.
Methods to Remove Write Protection from USB Windows 10
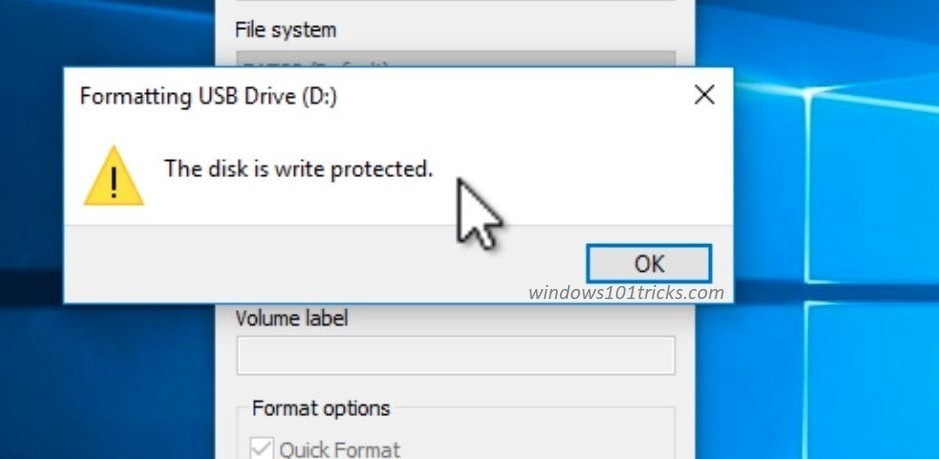
If you see this “disk write protected” dialog box, it means that the system administrator has chosen to set the limitation to modify the saved data. But if you are the admin and haven’t implemented any such restriction on the USB drive, it might have happened due to any of these reasons.
1# Scan the USB Drive for Virus Infection
- Whenever you plug a flash drive into your system, run an antivirus scan on it to make sure it is protected from virus or malware infection.
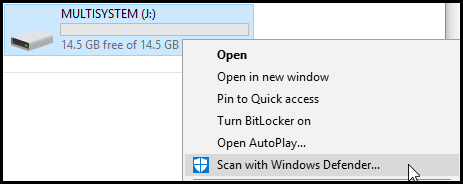
Viruses often fill USB drives with garbage files, provoking USB drives to come up with write protection errors. Chances are low that antivirus can fix this issue because the virus cannot be removed from the roots, so it is advised to recover the files before the virus damages them more.
2# Check the USB Drive Switch
This is the simplest step to perform. Check the mechanical switch on the drive; this is used to turn on and off the write protection.
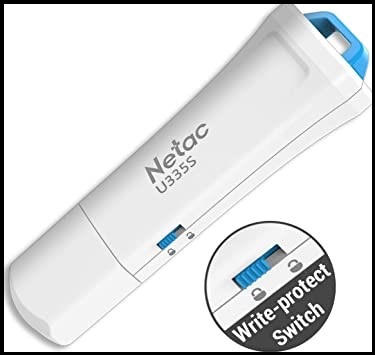
It is possible that while taking out or putting USB in a pocket or bag, the switch slides and activates the write protection.
3# Examine the Space of the USB Stick
If the USB device is full, then it can showcase this error, as the USB drive won’t allow a user to add any more data to the USB stick.
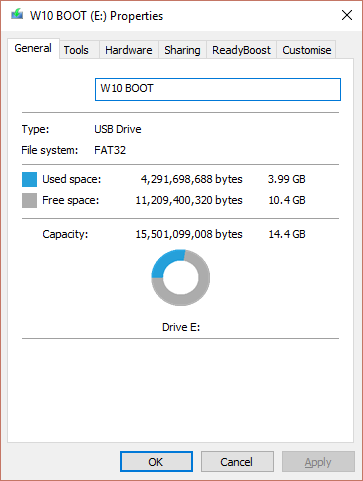
Windows Explorer >> My PC >> USB drive (right-click) >> Properties. Check the space and remove unnecessary files to add more data to it.
4# Withdraw Write Protection from Individual Files
Sometimes write protection assigned to single files can disturb the whole USB drive. This represents the entire drive as a write protection error device.
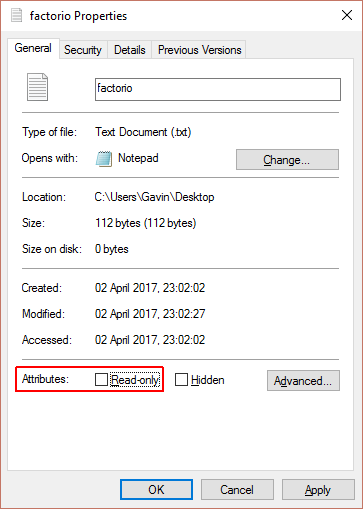
Locate the file and click the file >> Right Click >> Properties >> See Read Only attribute >>
Uncheck the read-only option.
5# Remove Write Protection from Pen Drive Using DiskPart Utility
Follow these simple steps to learn how to remove write protection from USB flash drive windows.
- Window key + key >> Command Prompt (Run as Admin) >> Type “diskpart” and hit Enter. >> type “list disk” and hit Enter. select disk [USB drive letter] >> Attributes disk clear read only.
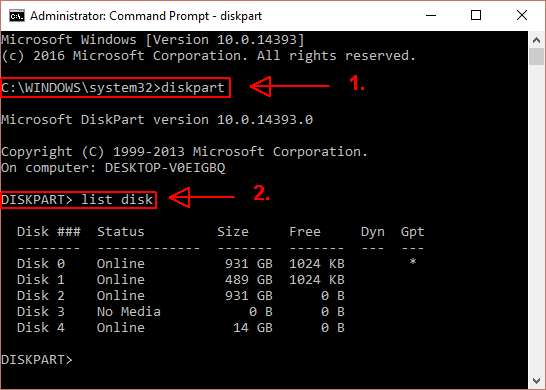
That’s it. You have remove write protection from pen drive.
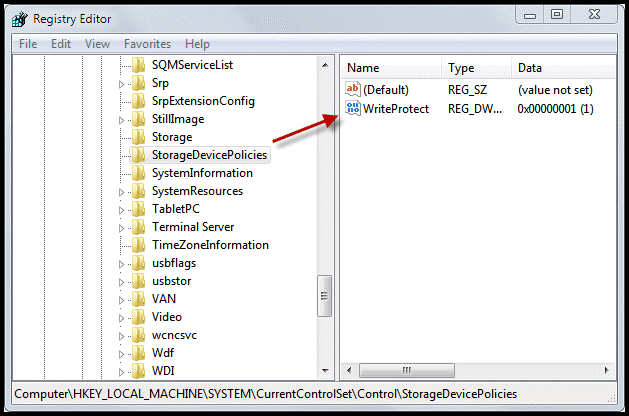
6# Use the Windows Registry to Eliminate Write Protection Error
If the error is still unresolved, then use these steps.
Windows key +R >> Type “regedit” and hit Enter. navigate to
USER_NAME\SYSTEM\CurrentControlSet\Control\StorageDevicePolicies
Search key named WriteProtect >> doubt, click the edit DWORD (32-bit value) box. >> Set the value to 0 and press OK.
7# Format the USB Drive
Before this step, run the USB Recovery solution for assured recovery of files. Make a backup of those files and keep them safe at a different location.
Make sure your data recovered and kept as a backup before proceeding with these steps
- Initially, in Window Explorer: >> My PC >> USB drive >> Right-click on it >> Properties >> Close the window.
- Search key named WriteProtect >> doubt, click the edit DWORD (32-bit value) box. >> Set the value to 0 and press OK.
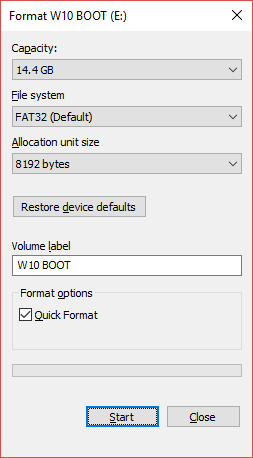
- Click on the USB drive this time and select the Format option.
- If the format failed to complete, it means there is a bad sector on the USB drive.
Alternative Way to Remove Write Protection from USB Windows 11, 10
Use the SoftwarePro USB Drive Data Recovery Tool to recover files that were jailed due to a write protection error. The software is designed to recover damaged files from USB flash drives. Extracted files and folders that were previously damaged and then extracted by the program will not be damaged. This app is one of the best solutions to recover corrupted data from USB.
That’s all of the files that were successfully recovered and remove write protection from pen drive error. It also removes folder.exe virus from pen drive. Use this software to successfully recover damaged, deleted, or formatted data from removable storage devices installed in Windows 10 and above without any restrictions.
Remove Write Protection from USB Windows – Quick Steps
- Download flash drive recovery tool it on your computer.
- Select any scan mode: scan deleted and corrupted data. Format Scan: Scan the format of the formatted data.
- Preview all recovered data in the flash drive recovery software panel.
- Click the “Save” button and save the captured data to any destination.
Final Verdict
Various factors can contribute to the prompt USB drive to showcase the Write protection enabled. The main concern is to figure out the cause and choose the proper action to recover it. In this blog, we covered all the possible causes and their solutions to remove write protection from USB windows. Choose the solution wisely according to your expertise or technical knowledge.
Frequently Asked Questions
Q: how to remove write protection from a pen drive?
5 simple steps to recover data from a flash drive:
- Download and run the flash drive recovery program.
- Attach the USB flash drive to the system
- Click “Scan” or “Scan Format“.
- Preview Deleted Data Recovered by Drive
- Click the “Save button to restore your data anywhere.
Q: how to remove write protection in Windows 11?
To remove read protection in Windows 11, right-click the file and select Properties > Remove Read Protection.
