How to Make USB Flash Drive Bootable for Windows OS? 2 Authentic Methods

How to make a USB flash drive bootable is a practice every computer user should learn. Flash drives are already favored and widely used to store data due to their portability and feasibility. It sounds too good to be true that you can carry your preferred Windows OS along with all the software you use on a single portable USB stick. This USB drive comes in handy in case of a computer emergency, virus attack or recovery of the system.
Expert IT professionals like to use a bootable USB drive as their “portable operating system” if any of the following situations occur in front of the user:
Here are all the methods listed below for how to remove write protection from USB flash drive windows. Choose the solution accordingly.
Why You Need Bootable USB Flash Drive
Users can copy the preferred Windows version with all their favorite tools and personal data on the Pen drive bootable. And use them in any of these circumstances:
- In case of a PC emergency, the bootable USB device is an instant solution.
- To use as the recovery system to repair the system or personal computer.
- For storing an image of the Windows OS.
- To upgrade an old operating system to the updated version.
- If the automatic upgrade does not function properly,
- For a clean reinstallation of the Windows system.
- Using as a portal operating system on a foreign system.
Method #1 Make USB Bootable for Windows OS
System Prerequisite
- Operating System – Windows XP, SP2, Windows 7 and above (32-bit or 64-bit)
- The user should be the administrator of the system.
- Installed Microsoft .NET Framework 2.0 or higher
- Processor – Pentium 233 (MHz) processor or faster i.e. 300 MHz is preferred
- USB flash drive – At least 8 GB pen drive/ USB device.
1: Firstly you need to download the Windows ISO file/image file. ISO file is the virtual copy of the Windows installation DVD. It can be downloaded from the Microsoft official website without having the product key.
2: After the download of the ISO file, follow these steps to copy them to the USB flash drive.
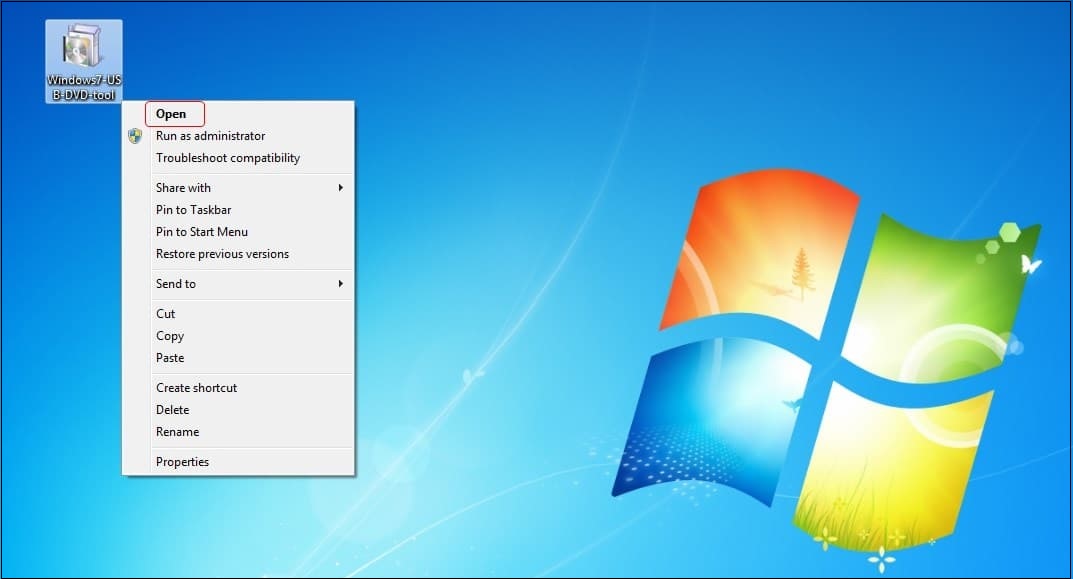
3: Download Windows USB/ DVD download tool direct from Microsoft’s official website.

4: Install by following the installation steps.

5: Launch the Windows USB DVD download utility and choose the ISO files by clicking the Browse tab. Select the ISO files and click on Next.
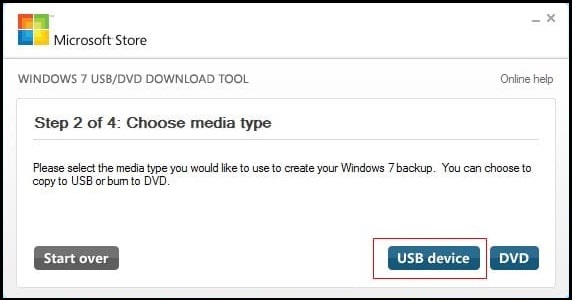
 6: In the next prompt, you would be asked to save the file to a USB drive or DVD. Choose a USB device.
7: Make sure the USB device is connected and recognized too. After detection of drive click on Begin copying. 
8: After completion of copying your USB device is ready. Close the Windows.
Now you can plug the device into the system. Only set up the BIOS setting to choose a USB drive for booting to start the operating system installation.
Method #2: Make USB Flash Drive Bootable Using CMD Command Prompt
- This method does not require any external assistance or the download of any software or program from anywhere. Follow these steps to make a flash drive bootable.
- Attach the USB flash drive to your Windows system.
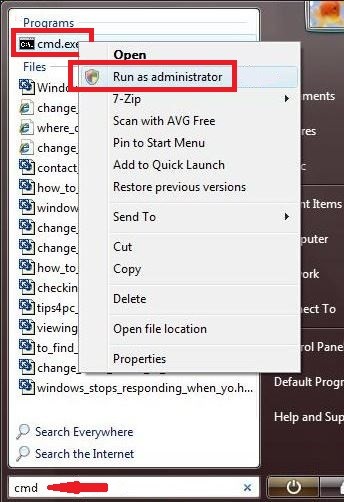
- Open the CMD prompt by typing cmd in the search column and running as administrator.

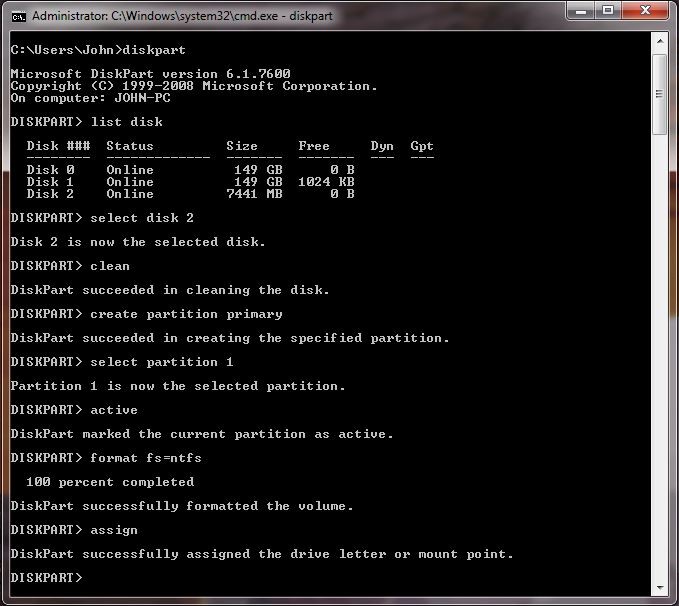
- In the CMD prompt write “disk part” and hit Enter key.
- The following detail will be displayed on the screen.
- Now write the next command “list disk” and hit Enter.

- It will showcase the connected USB drive. Type “select disk X” (Replace the X with the USB drive number)
- Type “clean” to wipe the drive
- Now type the “create partition primary” to create a separate partition on your USB flash drive/pen drive.
- Active status can be seen on the screen, now type “active” and hit the enter key. This will activate the partition.
- Now everything seems fine. So now you have to format your USB flash drive. Type “format fs=32” and press enter. The progress can be seen on prompt, wait till it is complete.
- Type “assign” and hit enter. Next type “exit” to end the disk management program.
- Now you can copy all Windows ISO files to the assigned USB flash drive/ pen drive.
Now you are ready to install Windows files to the system.
Hopefully, now you know how to make USB frive bootable using the command prompt method.
Change the Booting Order
After converting the USB drive to a bootable device, make sure to change the boot order on the particular system. Go to the BIOS settings >> explore the Boot menu >> find boot/boot order >> set removable device/ USB drive as the first choice in boot device priority.

Note! Remember this take backup all of your data files. Due to, the above-listed manual methods are having some limitation, such as they may lead to data loss problem.
Make USB Flash Drive Bootable for Windows OS – Alternative Solution
If users already lose their important data after executing the free methods to make USB flash drives bootable, So, no need to worry! Users can recover deleted Excel files from their pen drives using the world’s best recovery software, SoftwarePro USB Data Recovery Tool. This recovery tool is programmed after taking all the major things into consideration.
Mostly, it facilitates a safe and secure recovery of formatted, deleted and corrupted files from USB flash drive. the utility also to remove write protection from USB Windows without any losing information.
Steps to Make USB Bootable Windows 11, 10, 8, 7
- Download and launch the application on your Windows PC. After that tool provides two options for data recovery.

- Now preview your all recovered deleted excel file from pen drive in the tool panel.

- Finally, hit on save button to recover deleted files after Windows 10 Update at the desired location

Concluding Words
When the user searches for how to make a USB flash drive bootable it shows his awareness to deal in case of any system emergency. Users can choose any of the two methods to make USB drive bootable. None of them require any third-party tool to do the task.

