Migrate Office 365 Users to Another Tenant – A Transformative Journey!
The demand for Office 365 cloud service is rapidly increasing. Many organizations are moving toward this cloud service. We have often seen organizations have to deal with multiple Office 365 tenants. However, managing multiple tenants is quite complicated because a single tenant contains several user accounts. Therefore, to decrease the complexity and manage multiple tenants efficiently, organizations decided to migrate Office 365 users to another tenant.

We’ll explore “How to migrate users between Office 365 tenants” using several effective methods here. But, before starting the transition we have to learn the reasons behind it.
Considerations for Migrating Office 365 Users to a New Tenant!
Have you ever wondered, why users want to move their Office 365 data to another account? If yes, then this section helps you to understand clearly. Just go through the listed points:
- Organizational restructuring requires the separation of business units or departments for clarity.
- Mergers and acquisitions necessitate combining or separating users from different organizations effectively.
- Improved compliance with regulations requires Office 365 cloud to cloud migration with better controls.
- Enhancing security protocols might demand moving users to a more secure environment.
- Streamlining costs by consolidating subscriptions under a single tenant can reduce expenses. Plus, consolidating data into one tenant simplifies management and improves overall efficiency.
- Different regions require a separate tenant for optimized regional performance.
Prerequisites to Migrate Office 365 Users to Another Tenant Efficiently!
We have to go through some necessary steps before performing the migration tasks which are as follows:
1 – Pre-Migration Planning – Fulfill all the necessary prerequisites of migration.
2 – Source & Destination Tenant Preparation – Increase the licenses in destination tenant, and create administrator accounts in source & destination tenant. The automated tool requires admin logins.
3 – Preparing the Domain – Domain preparation is required before proceeding Office 365 tenant domain migration process. We have to detach the domain from the source tenant and then we have to attach the domain to the destination tenant.
4 – Accounts Preparation – Prepare accounts of source and destination, for this create a CSV file in which you have to maintain the accounts to create a mapping between source and destination accounts.
5 – Activity Migration Day – Stop receiving new emails in the source tenant because if you still getting new emails in the source tenant then, you have to Run Re-running the migration.
Migrate Office 365 Users to Another Tenant – Top 2 Manual Method!
Now, we are ready to start the migration of Office 365 users to another tenant with the entire data. However, there is no practical manual method for this task. Well, come down! Still, here we will discuss one trick i.e. Export/Import via PowerShell & Outlook that is time-consuming & technical but effective. We divided the steps of the same in two phases which are as follows –
Approach 1). PowerShell
This solution is quite complicated and requires technical expertise. So, those who are familiar with these types of commands can follow the –
Phase 1. Exporting User Data from Source Tenant
For the same, make sure you have the required permissions (like the “Mailbox Import Export” role). Use the following commands to connect to Exchange Online:
Connect-ExchangeOnline -UserPrincipalName deepa@example.com
- Ensure you have a network share accessible by the Exchange Online. Use this command to create the export request to migrate Office 365 users to another tenant:
New-MailboxExportRequest -Mailbox alexa@example.com -FilePath "\\<YourFileSharePath>\user.pst"
- Check Export Status
Get-MailboxExportRequest | Get-MailboxExportRequestStatistics
Phase 2. Importing User Data to Destination Tenant
- Connect to the Destination Tenant using these codes:
Connect-ExchangeOnline -UserPrincipalName softwarepro@exampletenant.com
Upload PST Files to Azure Storage (if needed): You can use Azure Blob Storage to get PST files into a location accessible by Exchange Online.
- Create the Import Request:
New-MailboxImportRequest -Mailbox admin@tenant.com -FilePath "\\<YourFileSharePath>\user.pst"
- Check Import Status:
Get-MailboxImportRequest | Get-MailboxImportRequestStatistics
That’s it! Your data is migrated to the new account. Now, you can remove your old account (if not needed). Ensure to create backup of Office 365 mailbox first, then delete it.
Approach 2). Outlook
Outlook is a well-known platform, and we can transfer M365 data by syncing this to another one. Sounds interesting! Let’s learn the instructions to do so –
Understanding the Hassles Associated with the Manual Method –
The manual procedure needs some technical know-how, & if you are not familiar with the export/import process to migrate Office 365 users to another tenant then you may face complications like –
- This is a time-consuming process since it requires manual steps for each user migration individually.
- Risk of potential data loss if not carefully managed during manual transfer of information.
- Increased risk of human error when inputting user details and settings.
- Difficulty in maintaining data integrity & consistency across different user accounts.
- License assignments must be manually managed and can cause delays.
- Requires manual adjustments to DNS records, causing potential downtime.
How to Migrate Office 365 Users to Another Tenant – Hassle-Free!
Now, after understanding the manual solution limitations, it is essential to opt for a reliable & 100% secure Office 365 Migration Tool. This utility is the best way to transfer Office 365 user’s data from one account to another. It is fulfilled with multiple advanced features which are given below –
- Migrate entire user’s emails, contacts, calendars, and documents between tenants simultaneously.
- Provides mapping options for source & destination tenants.
- Date filter option to migrate selective data from Office 365 user’s data to another tenant.
- Support account-based priority migration.
- Re-run migration – Retry failed items, Re-Run full migration, delta migration.
- Multiple project creation options are available on this tool.
- Support concurrent user migration.
Download the Tool for free:
Working Steps to Migrate Office 365 Users to Another Tenant
Follow every step to successfully transfer Office 365 users data from one tenant to another tenant.
Step 1 – Launch the Software and select Office 365 as a source and destination.
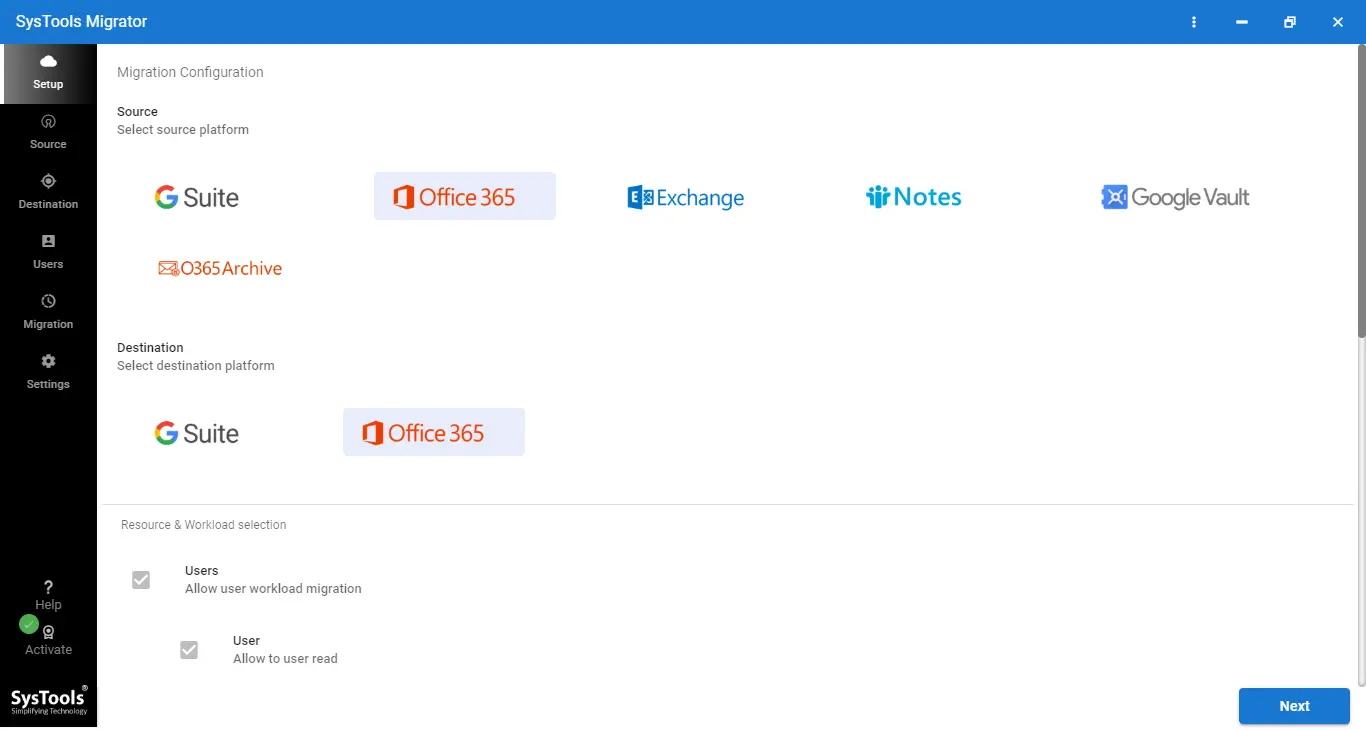
Step 2 – Allow migrating email, contact, calendar, and documents. It also provides the Date Filter option to migrate data selectively.
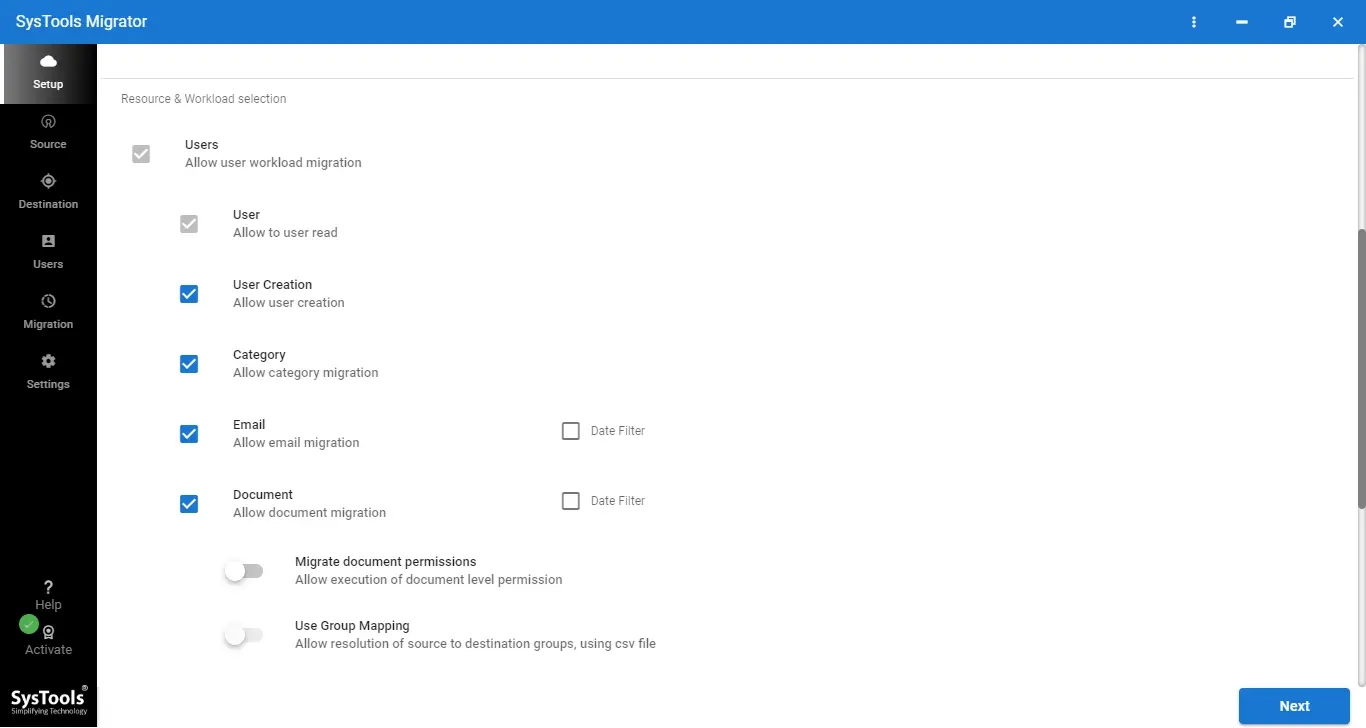
Step 3 – Enable Migrate document permission to migrate permission document, enable user group mapping option to create the mapping between users.
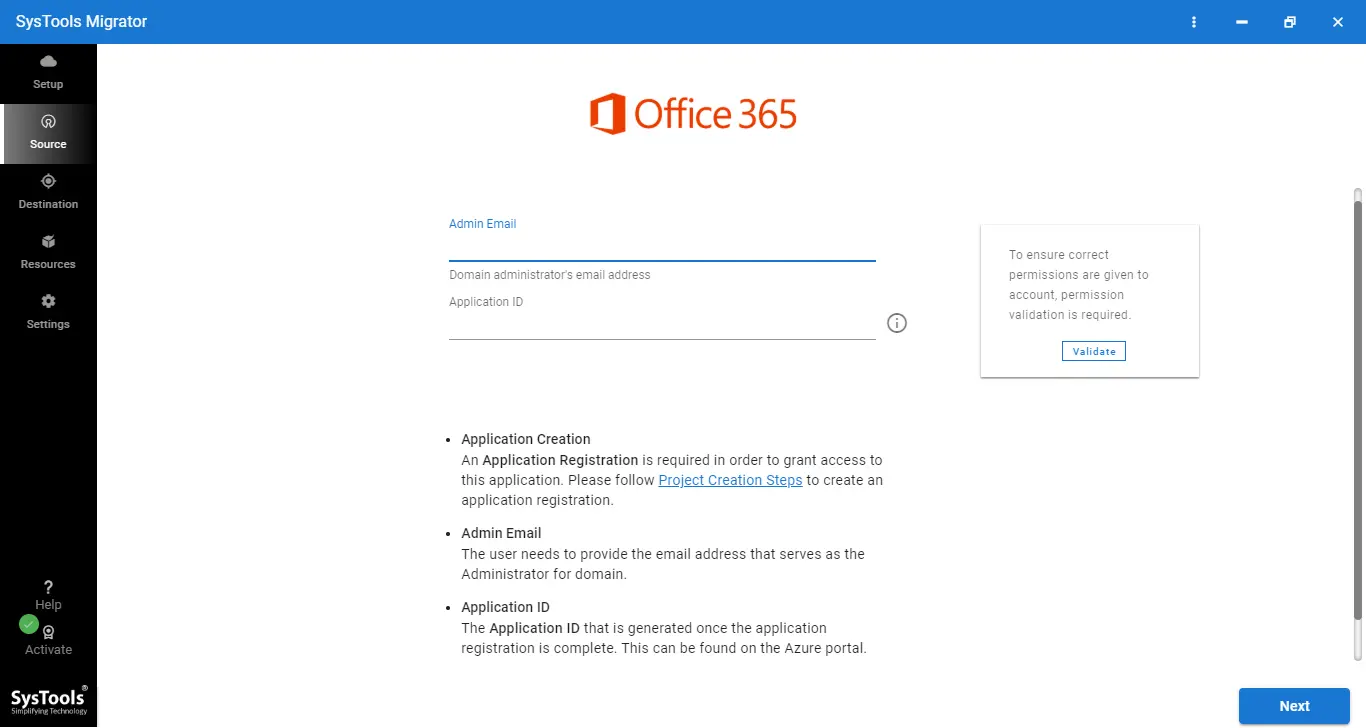
Step 4 – Log in with Office 365 source and destination admin accounts. Grant valid permissions.
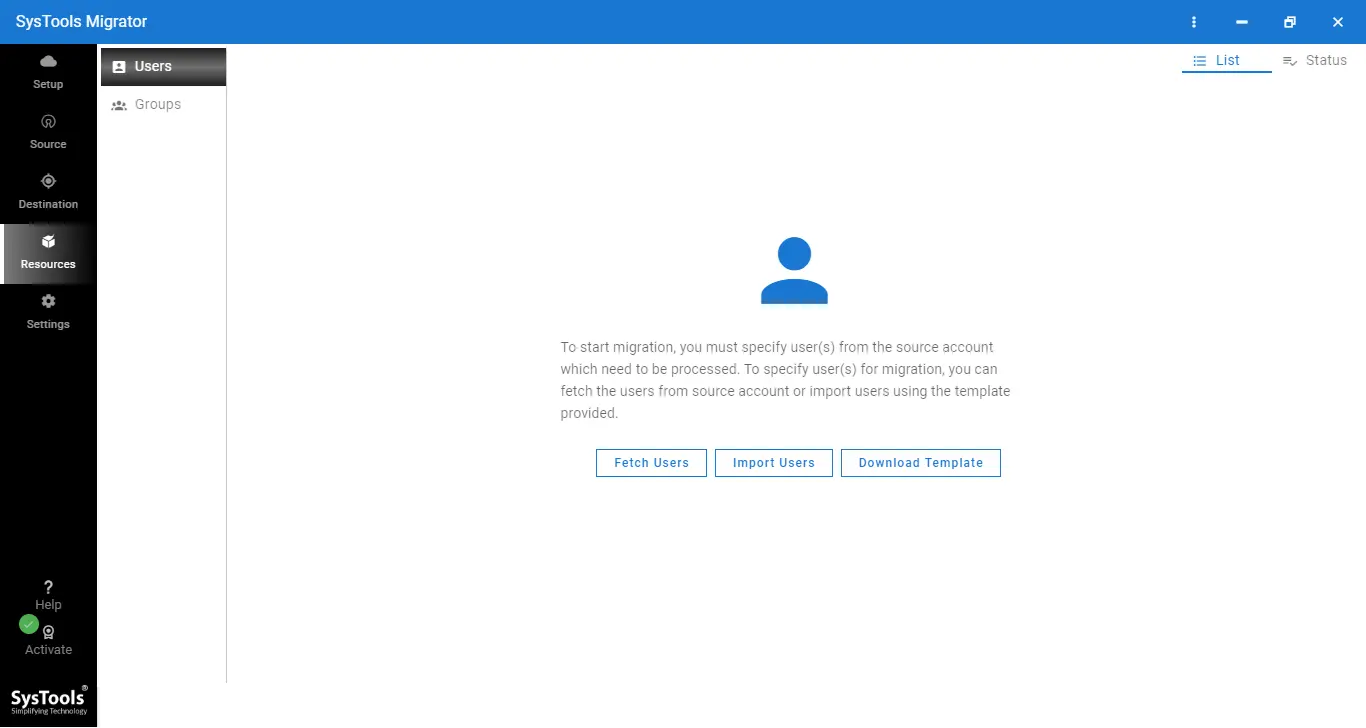
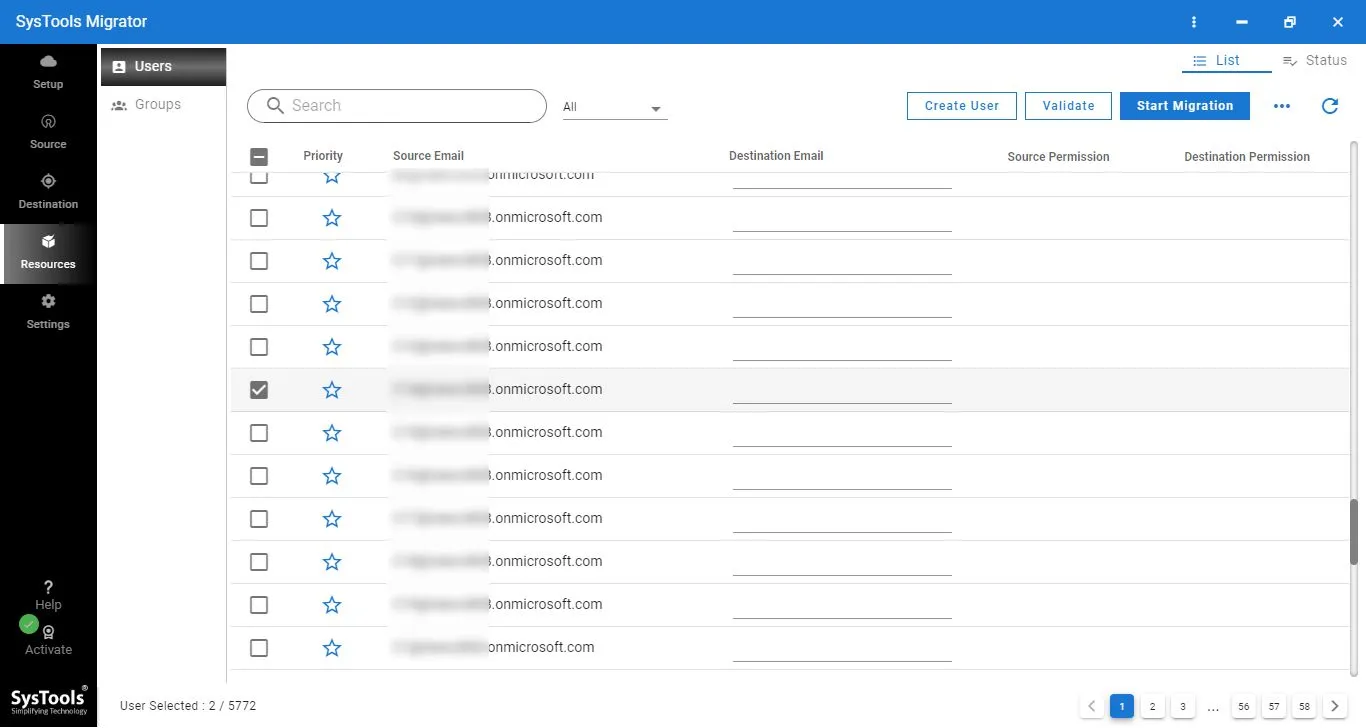
Step 5 – Fetch source users then, import the destination user (to import the destination user you can import a CSV file or you can add manually).
Step 6 – Now, click on the Start Migration button.
Final Recommendations!
- Pre-migration Testing: Test migration with a small group to identify potential issues.
- Backup Data: Backup critical data to prevent data loss during migration.
- Stay Updated: Keep informed about new Microsoft tools and migration updates.
Time to Conclude!
In this solution-based write-up, we have explained how users can migrate Office 365 users to another tenant. Some multiple users or organizations need to perform Office 365 to Office 365 migration and due to the unavailability of an efficient manual solution, we recommend this tool. As per experts, the above-suggested tool is the most trusted and accurate to move Office 365 users to another tenant.
Addressing Key Issues and Fixes in Office 365 Migration
There are several issues associated with this transition. But proper Office 365 migration project plan and expert tips prevent any type of hassles throughout the task. Therefore, here are some cases which are recently faced by users and solutions to fix them –
1. Issue: Users Cannot Access Their Mail After Migration
Cause: Due to DNS propagation delays or configuration errors, users face login issues or are unable to access their mailboxes.
Troubleshooting Tips:
- Ensure that all necessary DNS records are updated properly.
- DNS updates may require up to 72 hours for propagation.
- Run the SaRA tool to diagnose and fix mail access issues.
2. Issue: Licenses Not Assigned in the New Tenant
Cause: Migrating users to the new tenant without properly assigning licenses can prevent users from accessing the Office 365 services.
How to Resolve?
- After migration, assign necessary licenses manually or via PowerShell.
- Ensure new tenant licenses match the original tenant’s service plans.
- Use PowerShell or CSV files for bulk license assignments efficiently.
3. Issue: Calendar Items Are Missing After Migration
Cause – Sometimes calendar data may not be transferred properly or entirely to the new tenant, especially when you migrating a large mailbox.
Troubleshooting Tips:
- Review migration logs for errors related to calendar synchronization issues.
- Manually export calendar items to PST files and import them via PowerShell.
4. Issue: Users Are Not Receiving Emails After Migration
Cause: Due to any reason, if your email routing or domain settings are incorrect, emails may be delayed or undelivered.
How to Resolve?
- Ensure MX records point correctly to the new tenant’s Exchange.
- Verify email delivery is working, ensuring no filters block emails.
- Use the Test-Mailflow cmdlet in PowerShell to verify email routing.


